Surveys Guide
Last updated: October 9, 2026
Introduction
In order to get started with distributing your Qualtrics survey into Canvas, you first need to add the survey to Qualtrics LTI and configure it for distribution.
This article will serve as a reference for what a Survey means in Qualtrics LTI, as well as details about Survey configurations.
Surveys
All surveys reside in the Surveys page of Qualtrics LTI on one of the three levels. To learn more about these levels, please consult 📄 Qualtrics LTI Levels: Institute, Department, Personal Surveys.
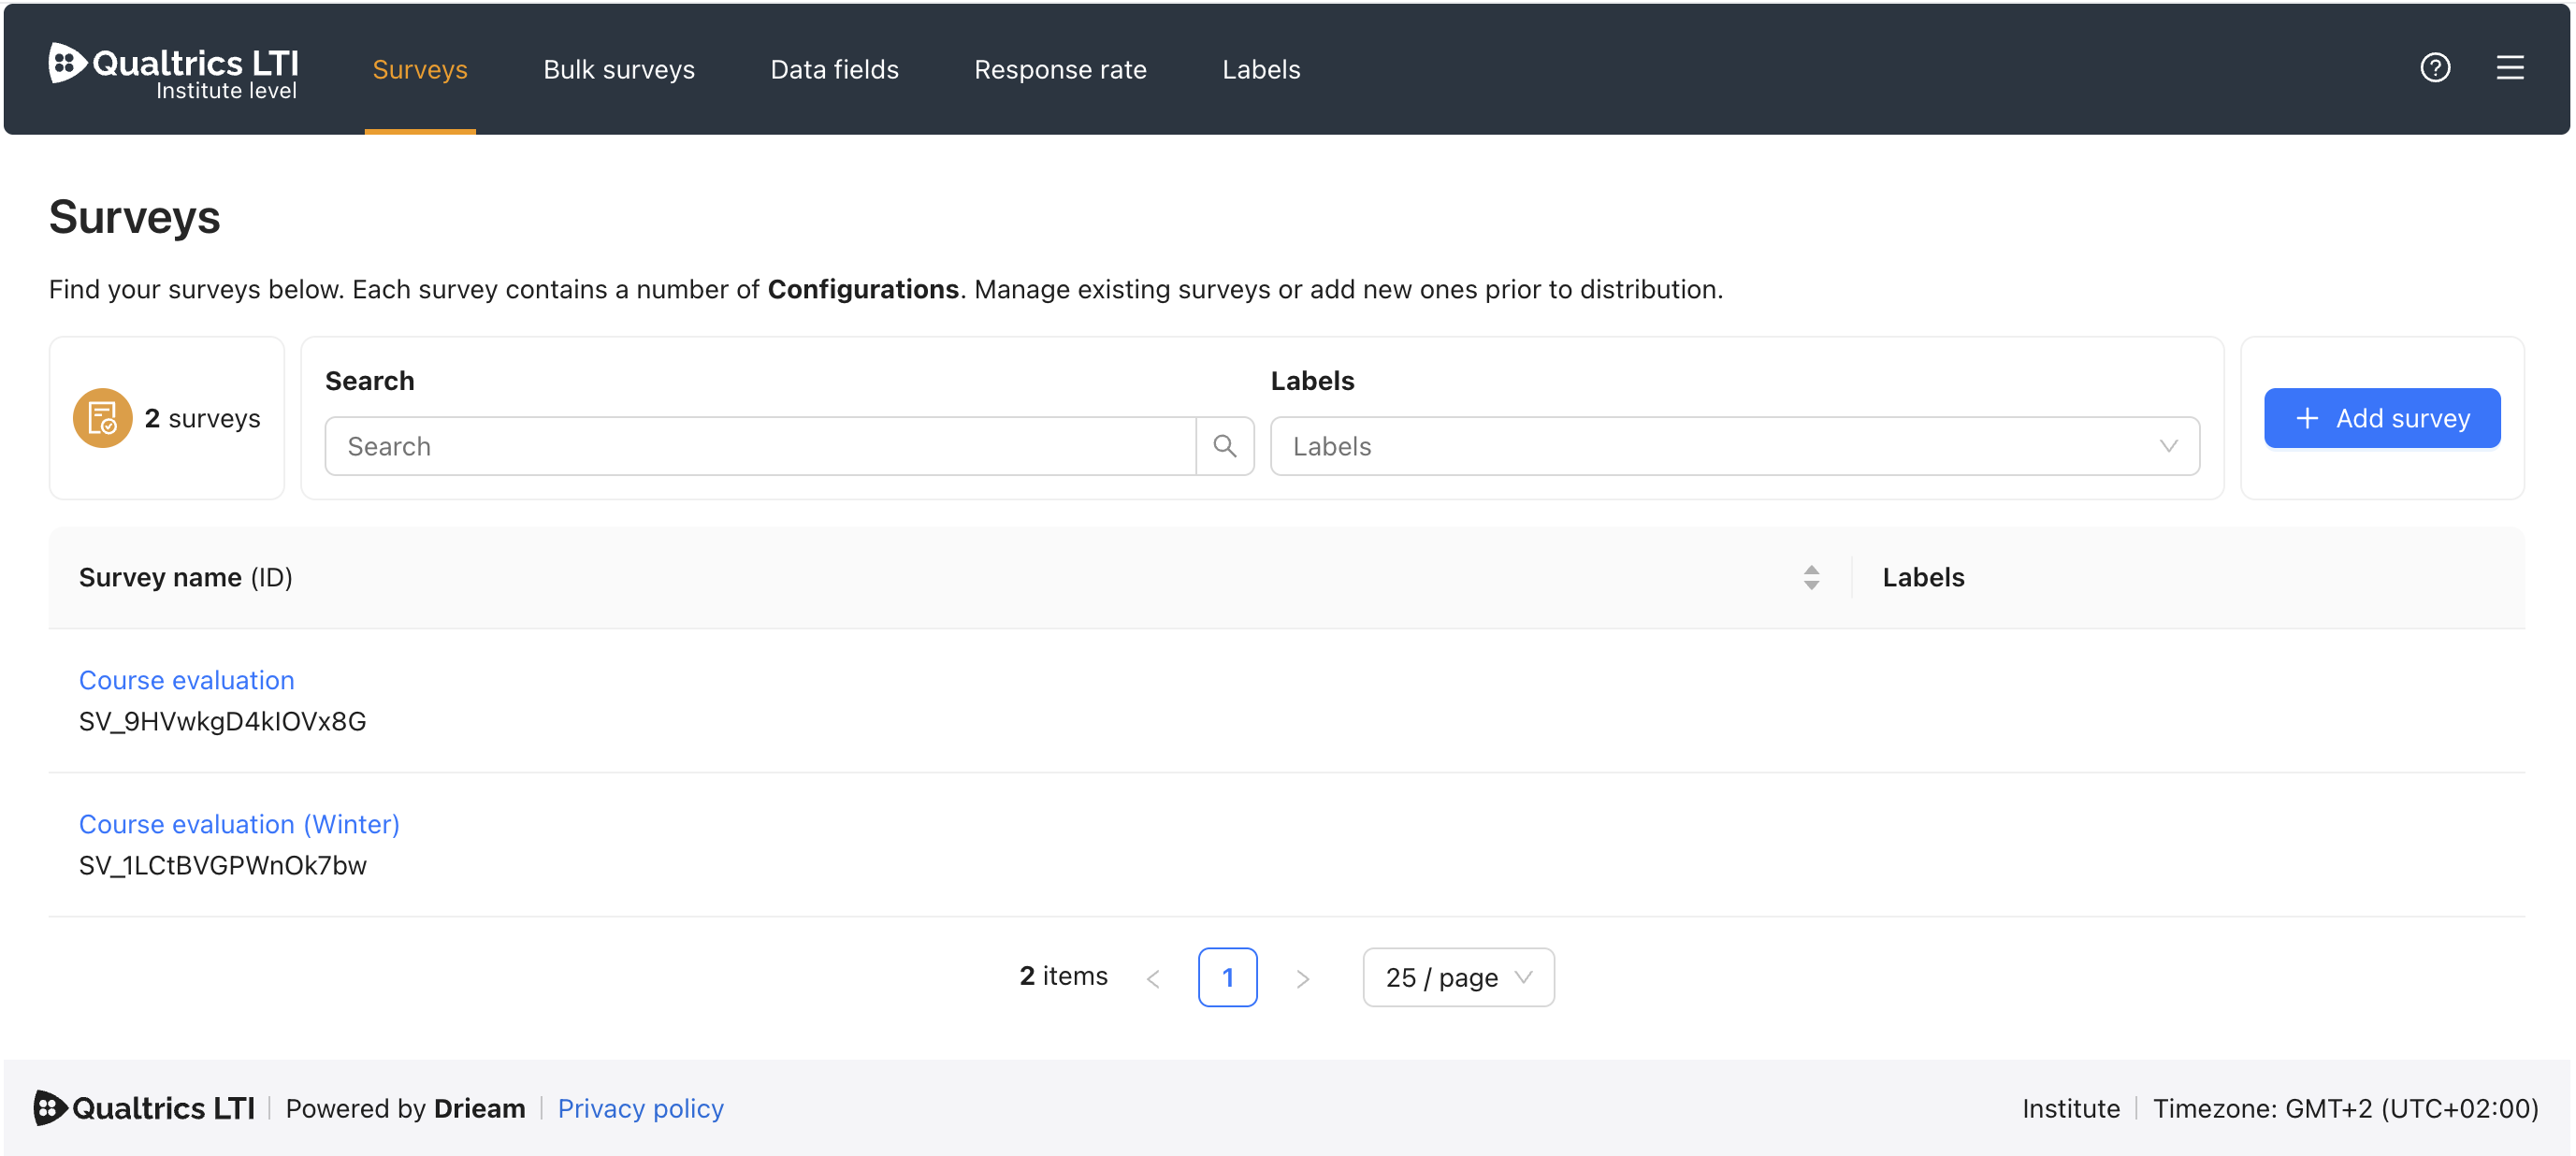
Adding a survey
To add a Qualtrics survey to Qualtrics LTI, simply click + Add survey, which will present you with a list of Qualtrics surveys to add. This list is generated based on all the surveys that the associated Qualtrics user of that level has access to. Who that user is depends on the level you're on:
Institute / Department level: The associated Qualtrics user is the owner of the Qualtrics API token that appears in the Domain Configuration § Linked Qualtrics domain section.
Example: The root account admin Jane Doe linked her API token on the Institute level of the LTI. When any user clicks the + Add survey button, they will see a list of all surveys that Jane Doe has access to.
Personal Surveys level: The associated Qualtrics user is the Qualtrics user account who was logged into on that level.
Example: The instructor John Smith accesses the Personal surveys level of the LTI via his account tab. He logs into Qualtrics. When he clicks the + Add survey button, he sees a list of all his own surveys that he has access to.
Note: Don't see a survey that you're expecting to? Make sure that the associated Qualtrics user of the level has access to the survey.
A single Qualtrics survey can be added to each level once. For example, "Course evaluation (Winter)" could be added to the Institute level, any number of Department levels, and multiple users' Personal Surveys levels.
Survey configurations
When you distribute the survey into an assignment, you will select a Survey configuration. These are unique bundles of settings and embedded data fields that allow you to distribute the same survey in numerous different ways.
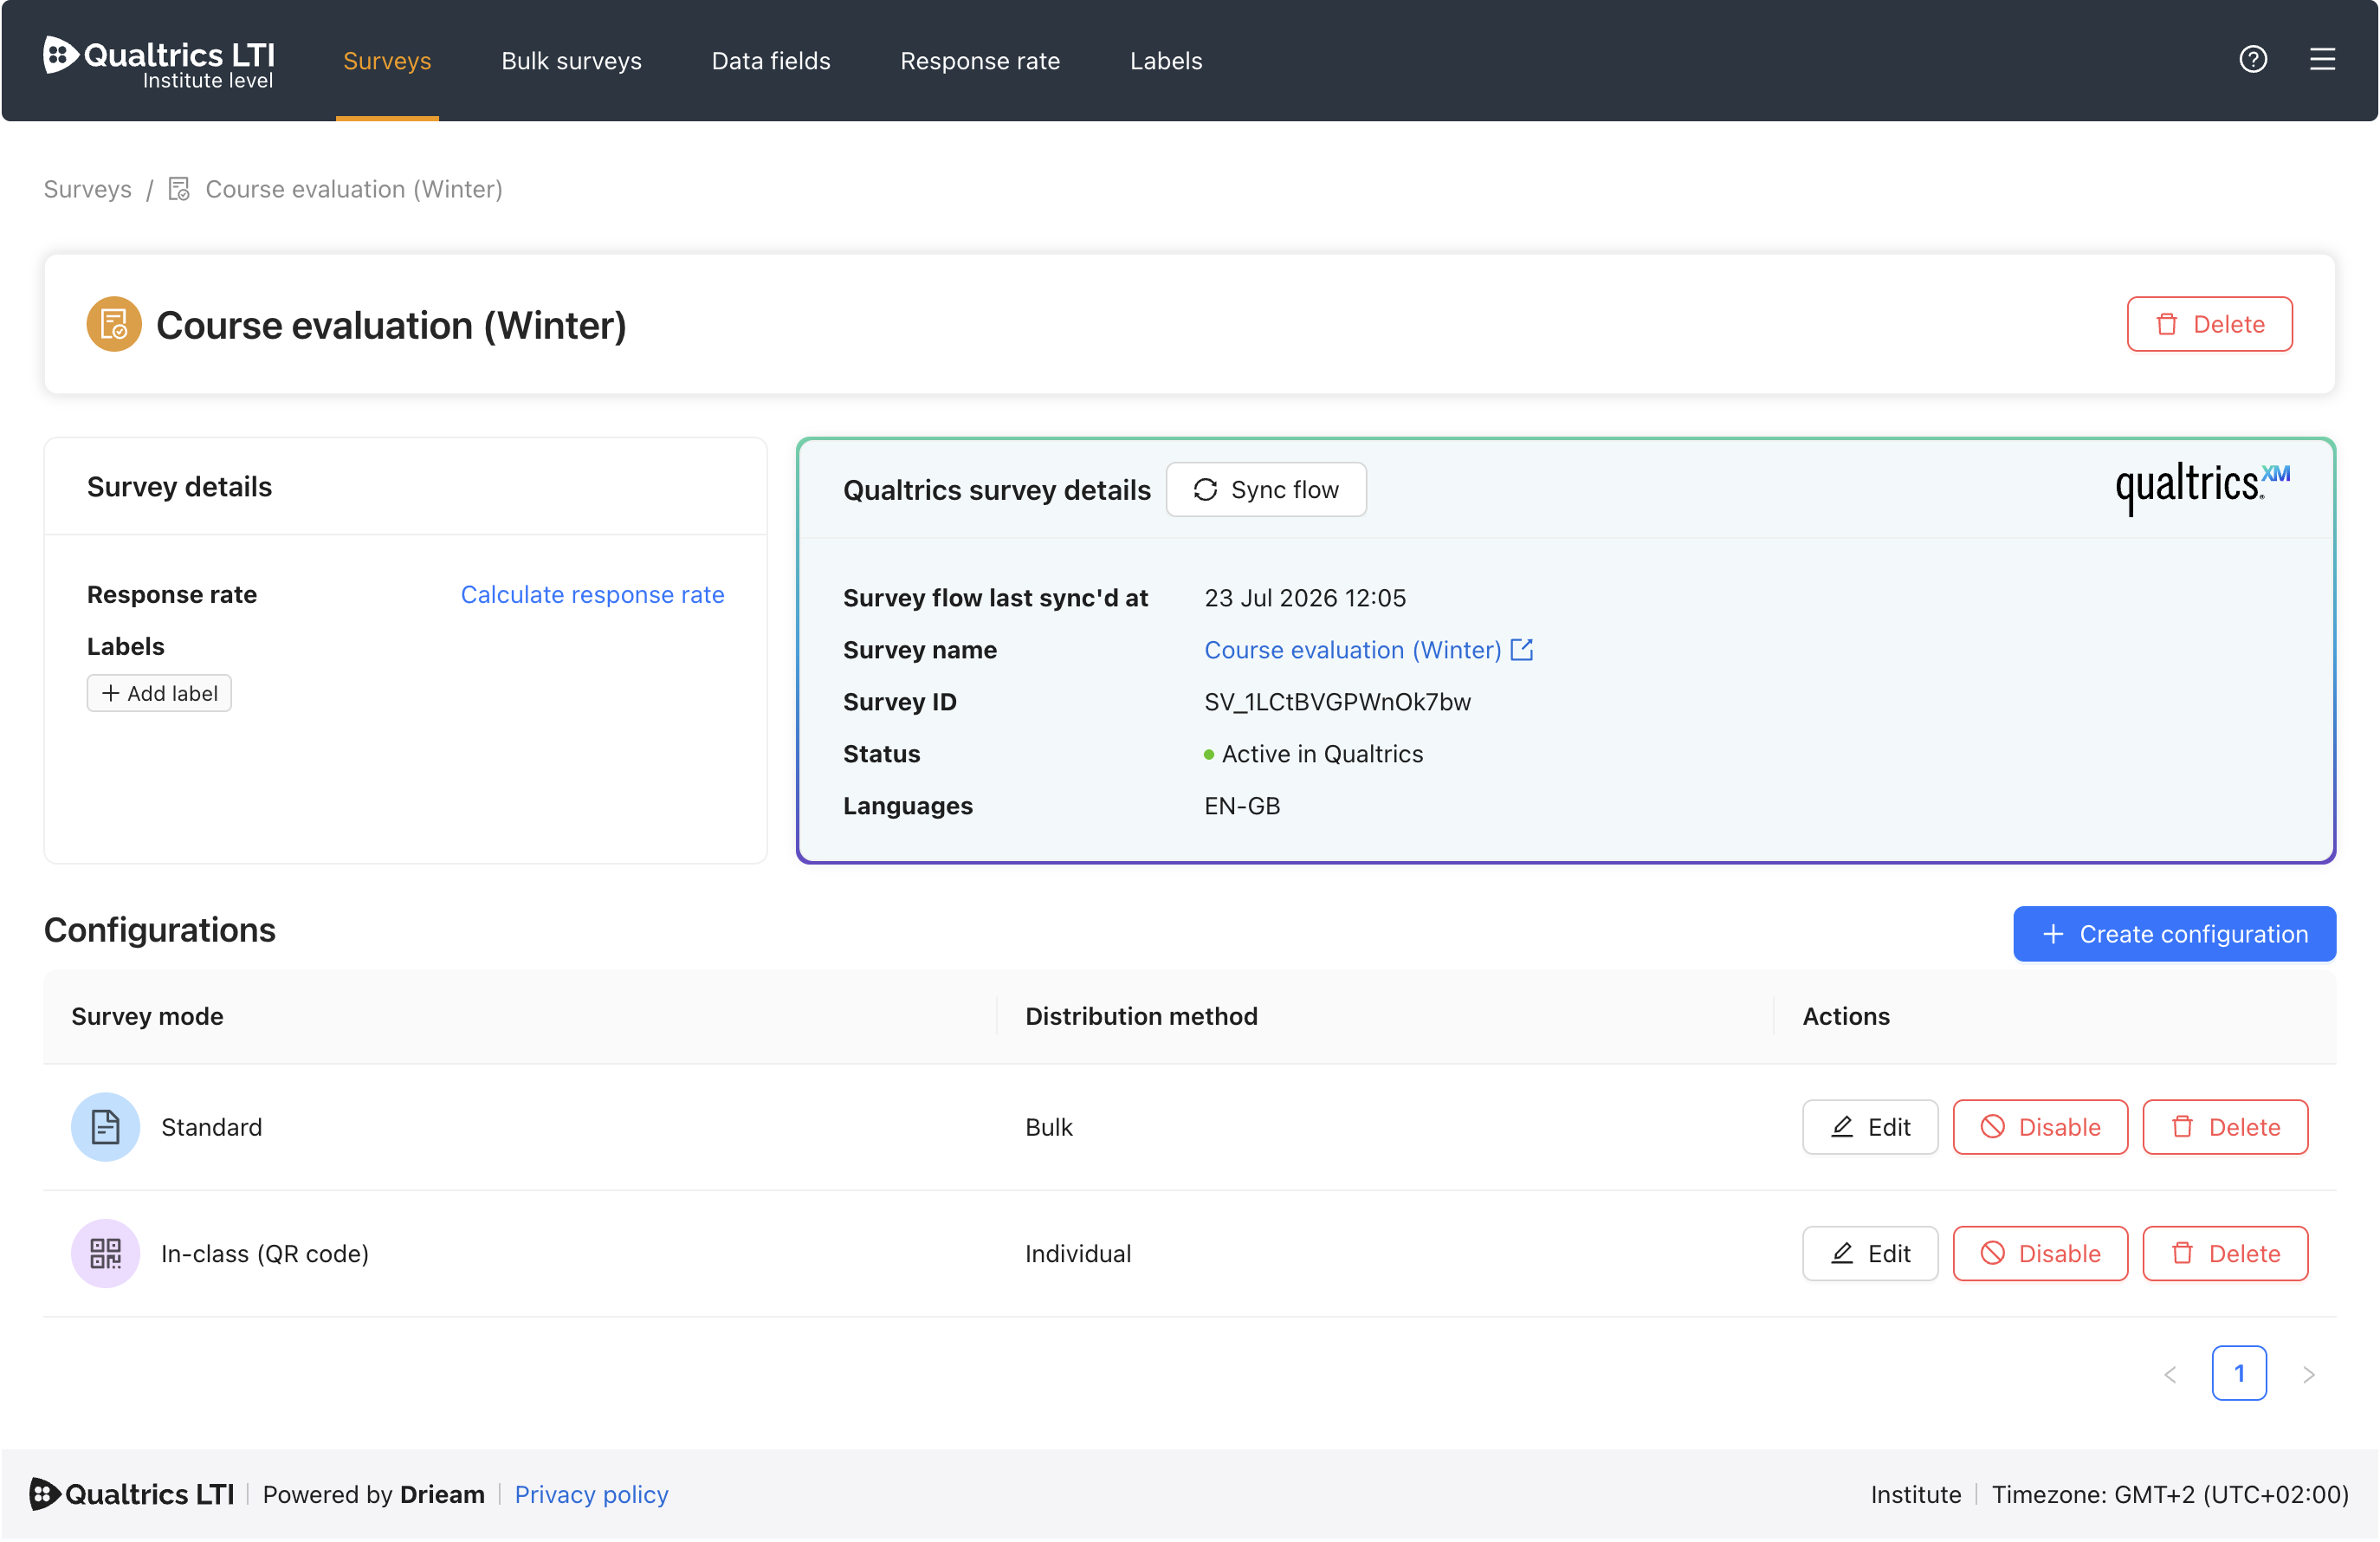
Creating a configuration
To add a Survey configuration to the given Survey, click + Create configuration.
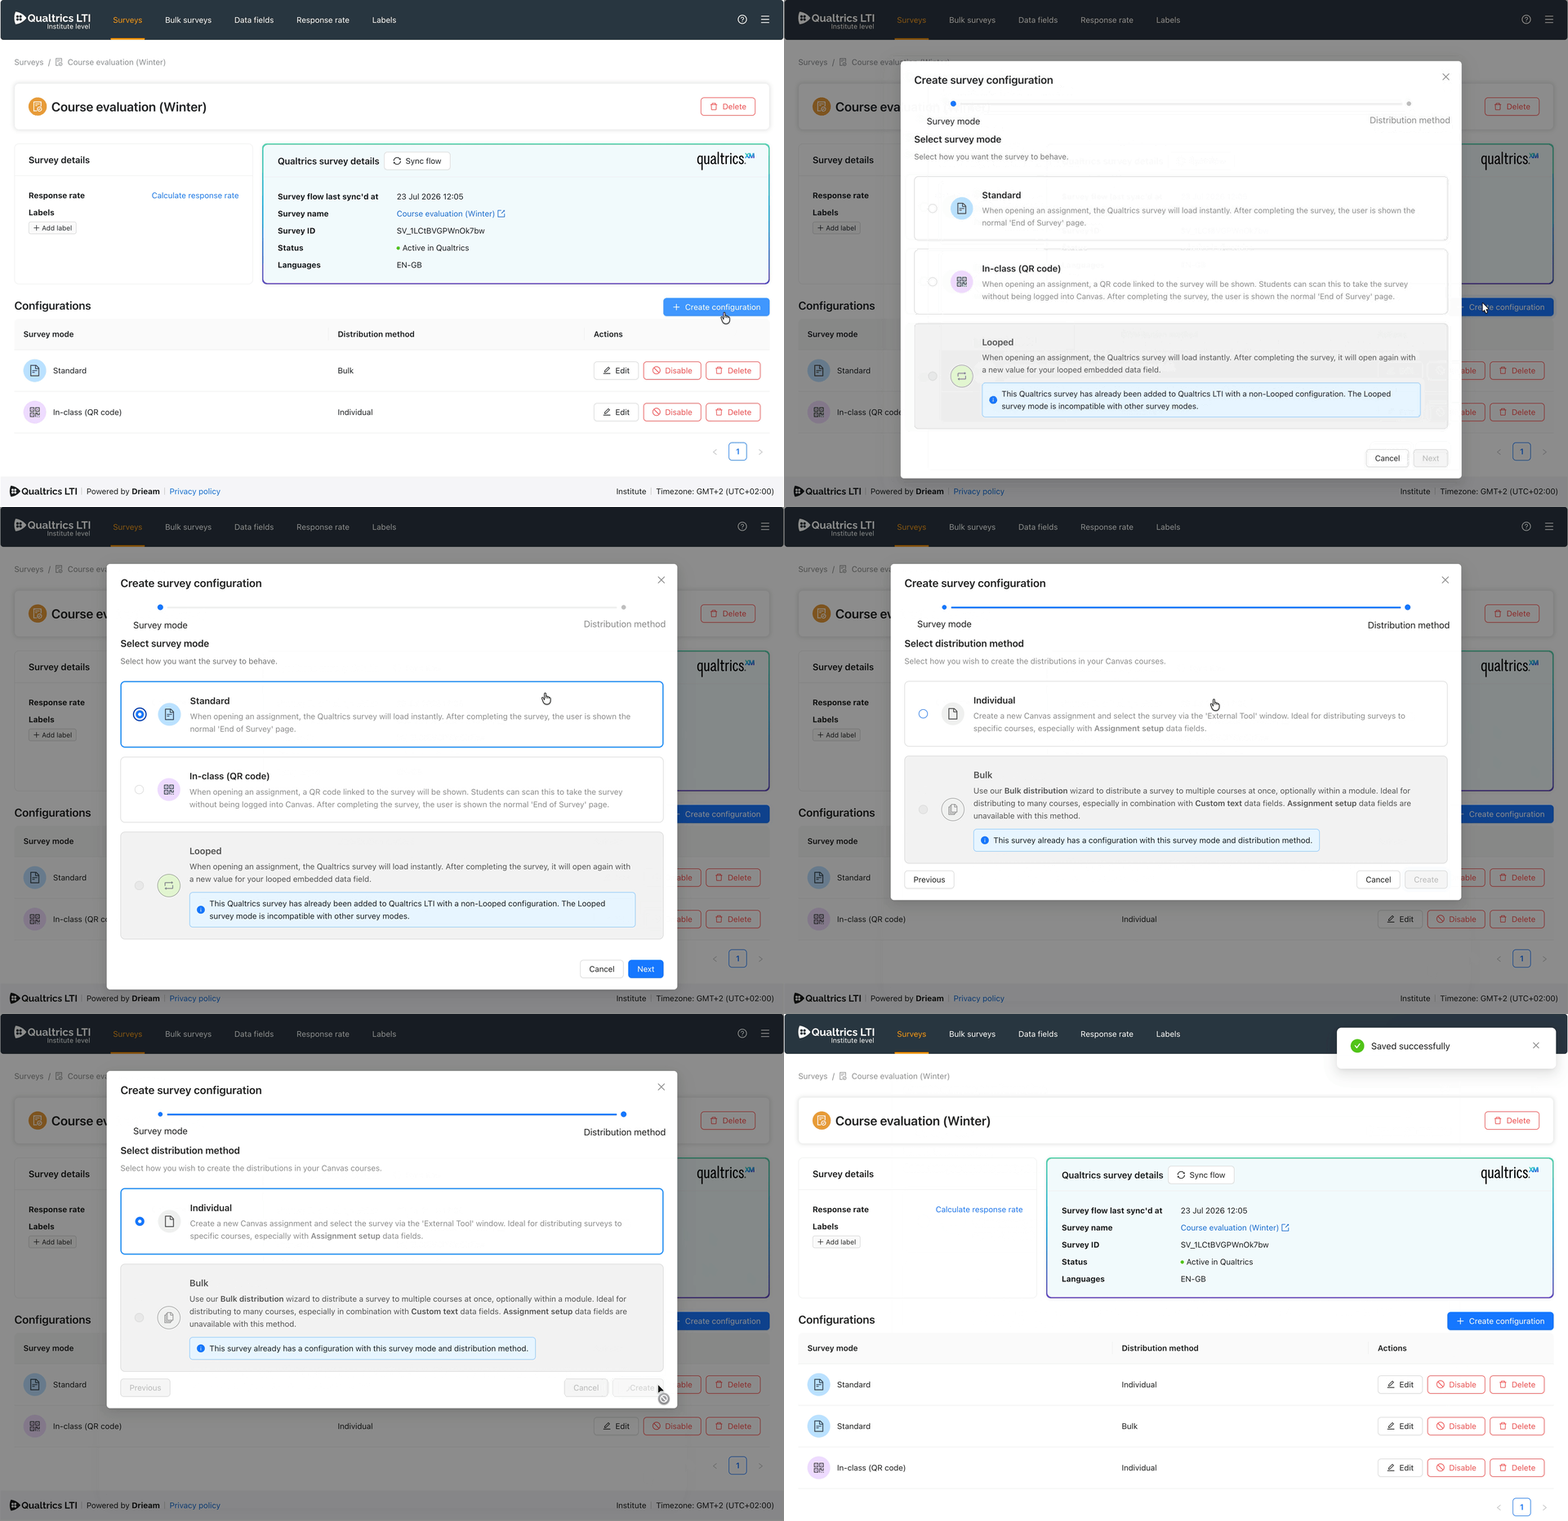
Survey mode
This determines how Qualtrics LTI will handle the survey.
Standard
This is the default behaviour of Qualtrics LTI: When a student opens the associated Canvas assignment, the survey will simply open. Embedded data field values will be present in the survey and its response as normal.
After completing the survey, the student will be shown the usual 'End of survey' page and a Canvas submission will be made (if enabled).
In-class (QR code)
This allows you to distribute a survey in a classroom, similar to Qualtrics' own QR code distribution method.
When an instructor opens the associated Canvas assignment, Qualtrics LTI will show a QR code — this can, for instance, be shared on a projector in a classroom or lecture hall. When a student scans the QR code, they are taken to the survey and the embedded data field values are forwarded through.
After completing the survey, the student will be shown the usual 'End of survey' page and a Canvas submission will be made (if enabled).
Note: QR codes create anonymous submissions, meaning that students are not logged into Canvas when they respond. Therefore, embedded data fields relating to student data (e.g. 'First name') are unavailable.
Looped
When distributing, an embedded data field will be chosen as the Loop source. When a student opens the associated Canvas assignment, the survey will simply open. Embedded data field values will be present in the survey and its response as normal, except that the Loop source will have only its first value sent through.
After completing the survey, the response will be sent to Qualtrics and the survey will open itself anew, creating a new, blank response. The second value of the Loop source will be sent through.
This looping repeats until all of the values of the Loop source have been looped over, and then once the student completes the final response, they will be shown the usual 'End of survey' page and a Canvas submission will be made (if enabled).
For more information, see 📄 Looped Surveys Guide.
Distribution method
The distribution method that you choose determines how your Survey configuration will be distributed. This allows you to set up different configurations for distributions that you intend to distribute individually vs. in bulk.
Individual
This allows you to distribute the associated Survey configuration individually (i.e. to one course at a time).
After creating the configuration, navigate to either:
<Edit survey configuration> → + Create distribution.
Canvas course → Assignments → New assignment → Submission type → External tool → Qualtrics LTI.
For more information about how to distribute individually, please consult our 📄 Individual Distributions Guide.
Bulk
This allows you to distribute the associated configuration in bulk (i.e. to many courses at once), even creating multiple assignments if you wish. This is powered by our Bulk Survey Wizard.
After creating the Configuration, navigate to Qualtrics LTI → Bulk surveys and create your bulk distribution there.
Note: Bulk surveys are only available for admins at the Institute and Department levels of the LTI.
For more information, please consult our 📄 Bulk Surveys Guide.
Setting up your configuration
Settings
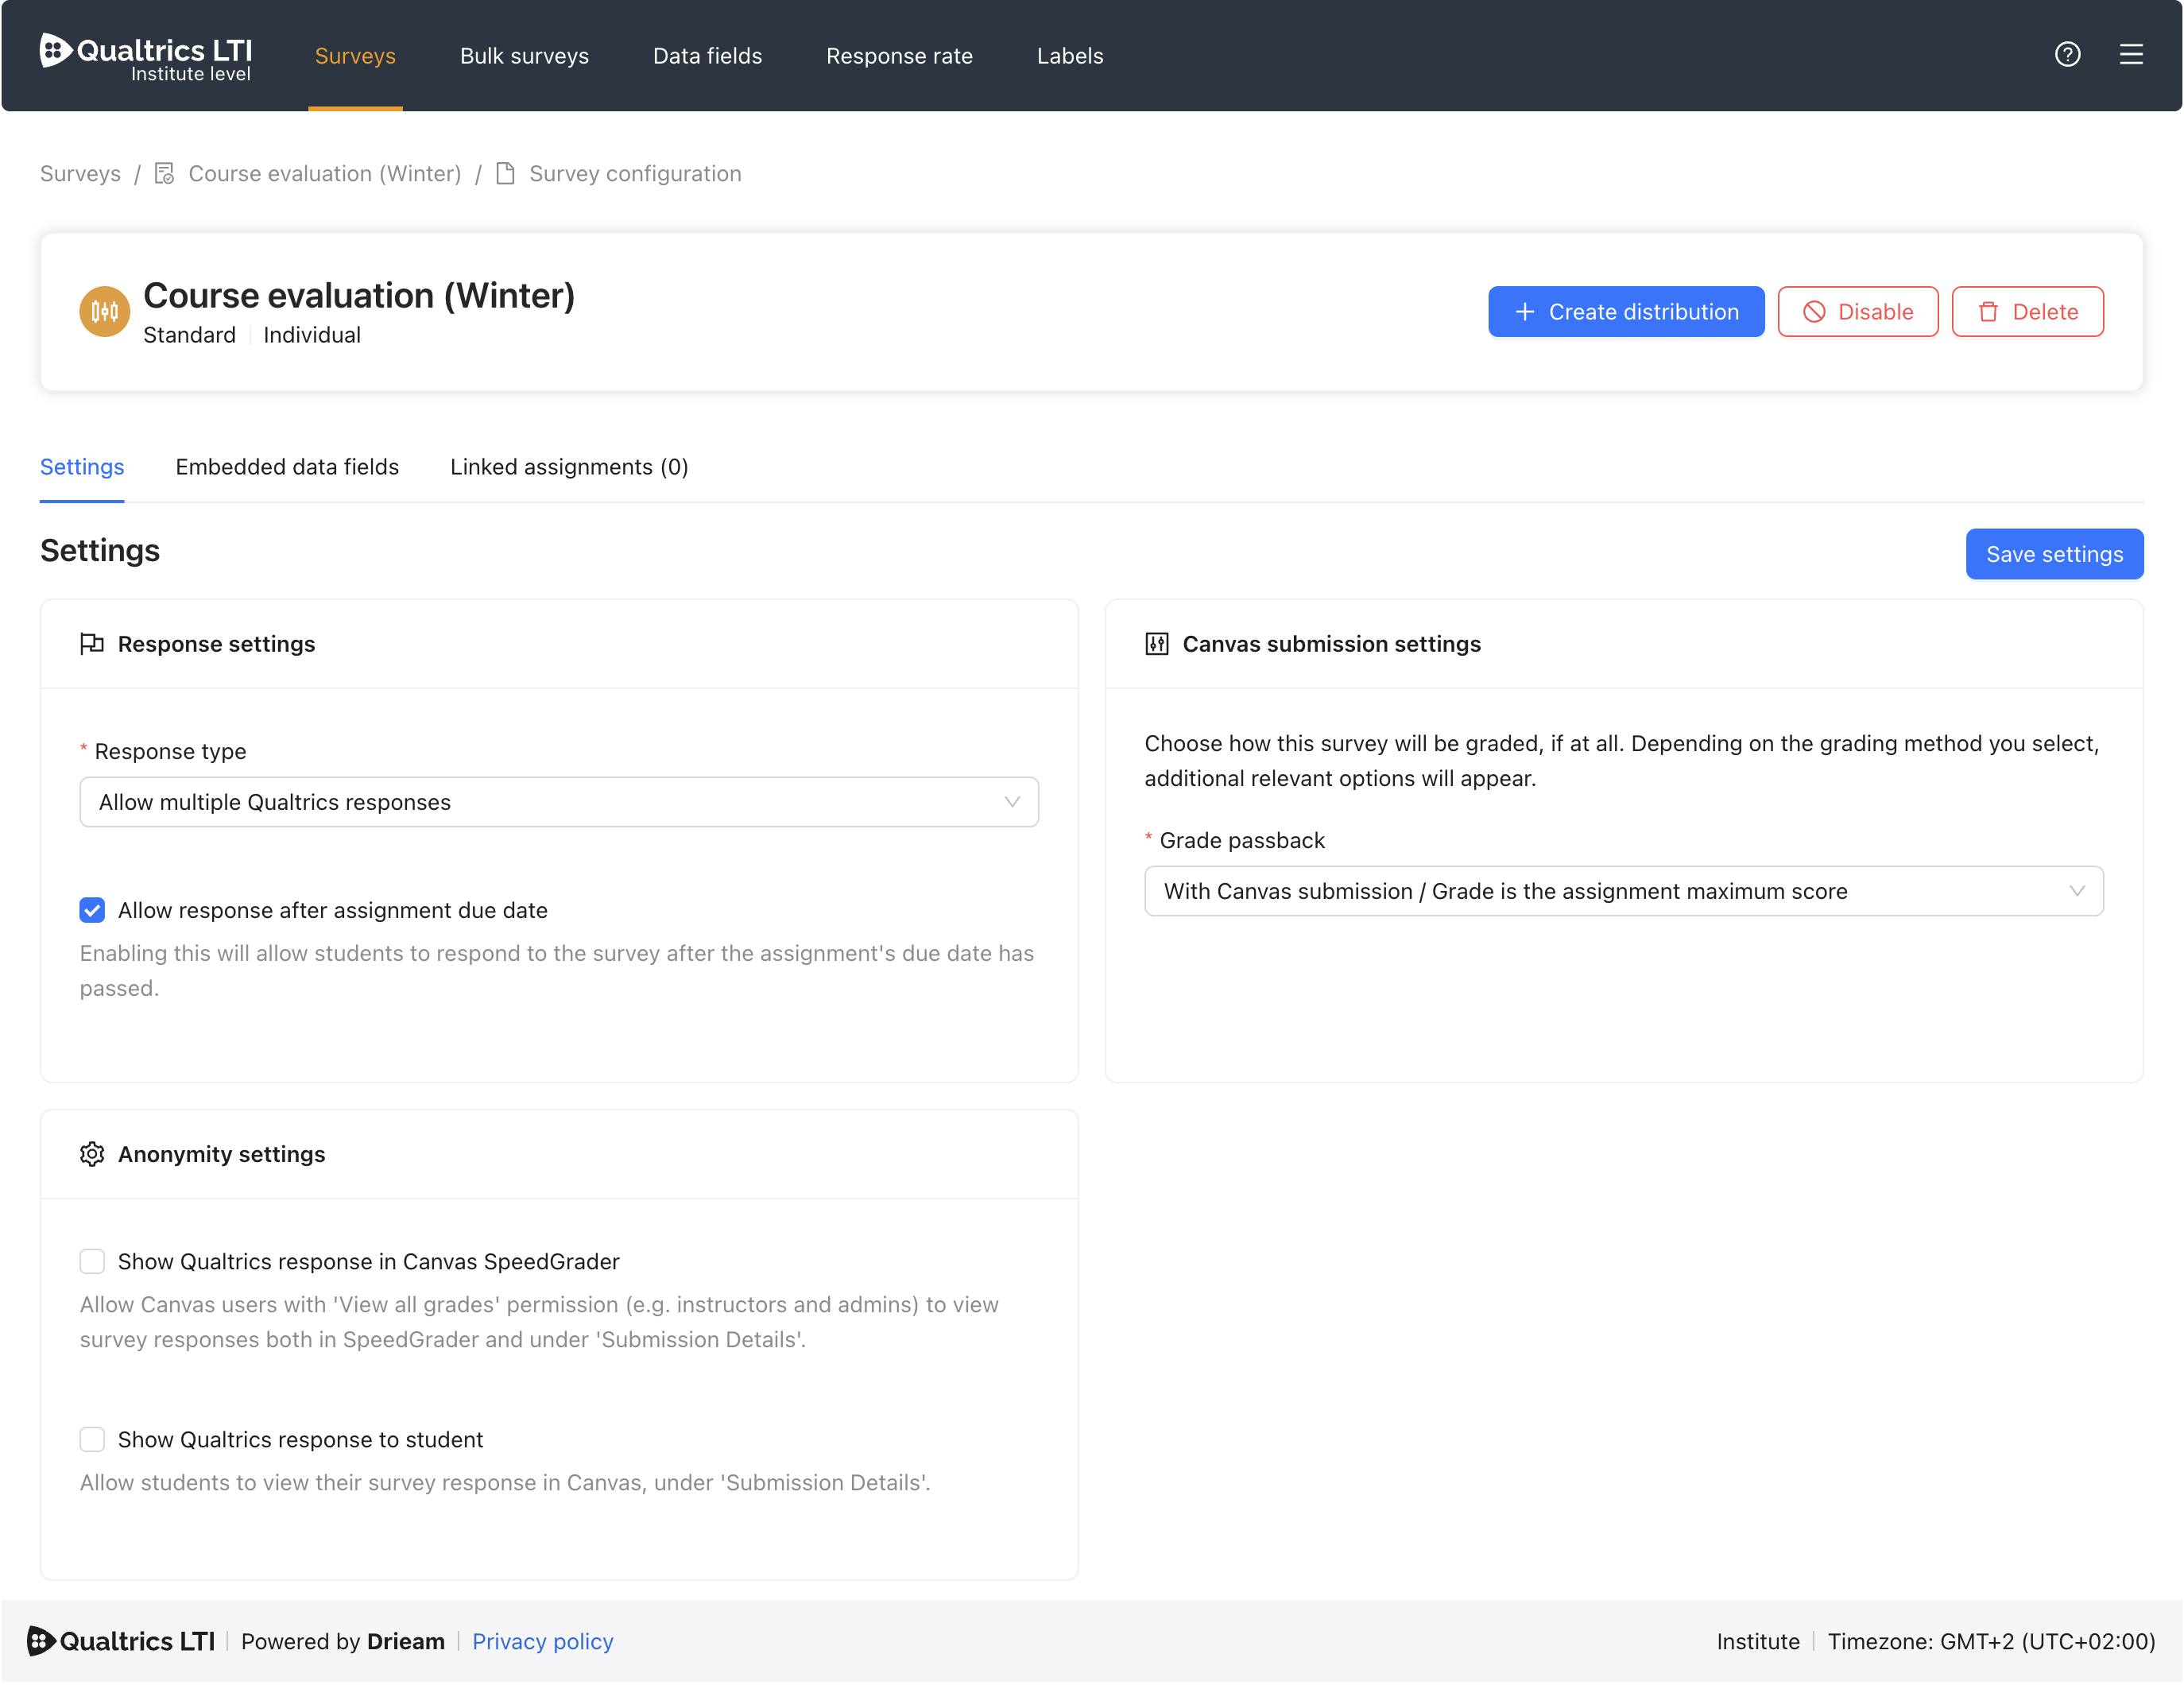
Note: For more information on how each setting affects your distributions, please consult our 📄 Settings Guide.
Embedded data fields
You can enrich your survey responses by activating embedded data fields in this section.
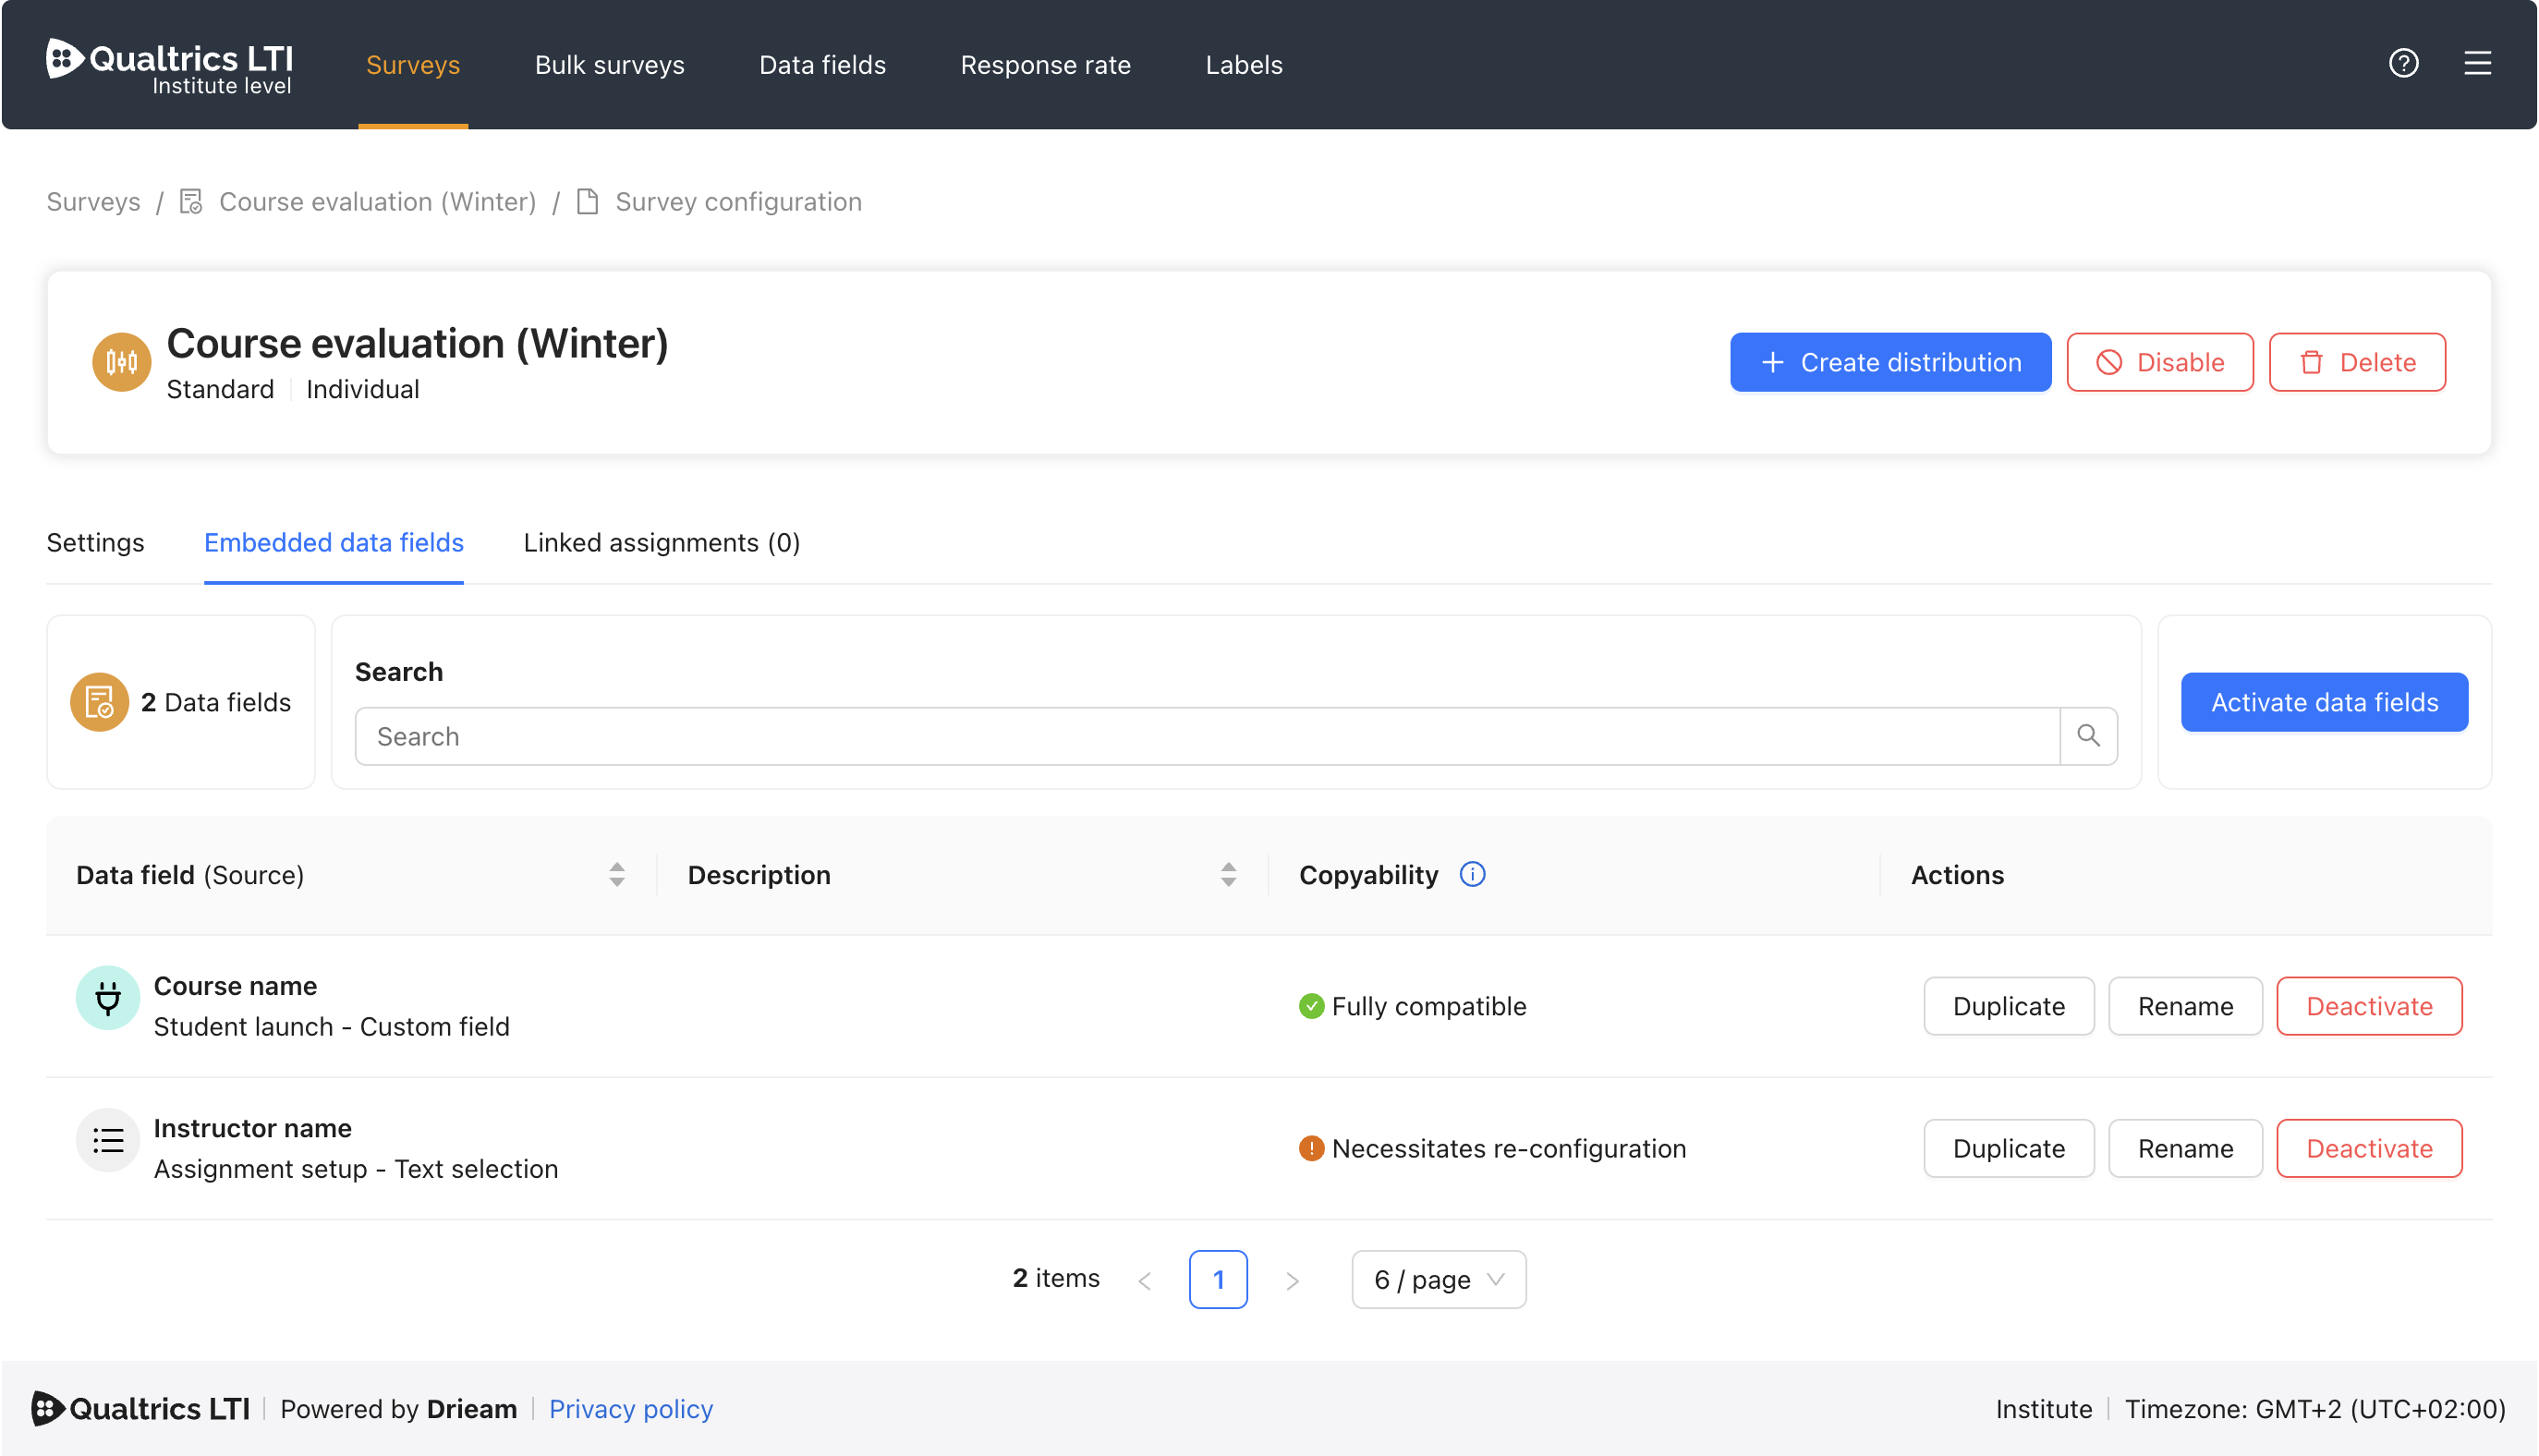
Note: For more information on how to set up and activate embedded data fields, please consult our 📄 Embedded Data Fields Guide.
Further Reading
The following articles reference this one, and will teach you how to distribute your surveys: